
You’re trying to increase engagement in your emails and you have an event coming up. You want to make sure your customers don’t miss it. Save the Date and Event Invitation emails are the perfect way to invite your guests. And to make sure they pencil in your event on their calendars, it’s a good idea to have an “Add to Calendar Link” option in your email as a call-to-action (CTA).
Add to calendar link invite in email or on your website
Adding a calendar invite to your email or website is not difficult, but can be a bit tedious. Don’t fret. Here’s a quick run through of just how to do it.
Create your calendar invites
First, make sure you have all of your event details handy – date, title, description, location, and the url to your event webpage (if you have one). You’ll want to create calendar invites in the 3 major calendar platforms – Outlook, iCalendar®, and Google® Calendar to include these 3 options in your email. Steps for setting up each are outlined below.
Outlook
Go to your Outlook calendar and select “New Appointment”. You’ll want to select this instead of “New Meeting”. In the “New Appointment” pop-up window, fill in all of your event details, set the notification reminder and then hit save. Once saved, find the event on your calendar and reopen it. From there you’ll want to click File-Save As and then save your appointment file to your computer and use the file format iCalendar to output an ics file (see below). Hang on to this file as you’ll need to attached it to your email or upload to your ESP and link to it there. More on that soon.
iCalendar®
Go to your iCalendar and create a new event. Include all of your event details and then hit save. Once the event is now on your calendar, drag the event from your calendar to your desktop (or a file folder where you have your other event information saved.) This will give you a ics file to use in your email. Hang on to it just like you did with the Outlook invite file and we’ll tell you how to use it shortly.
Google® Calendar
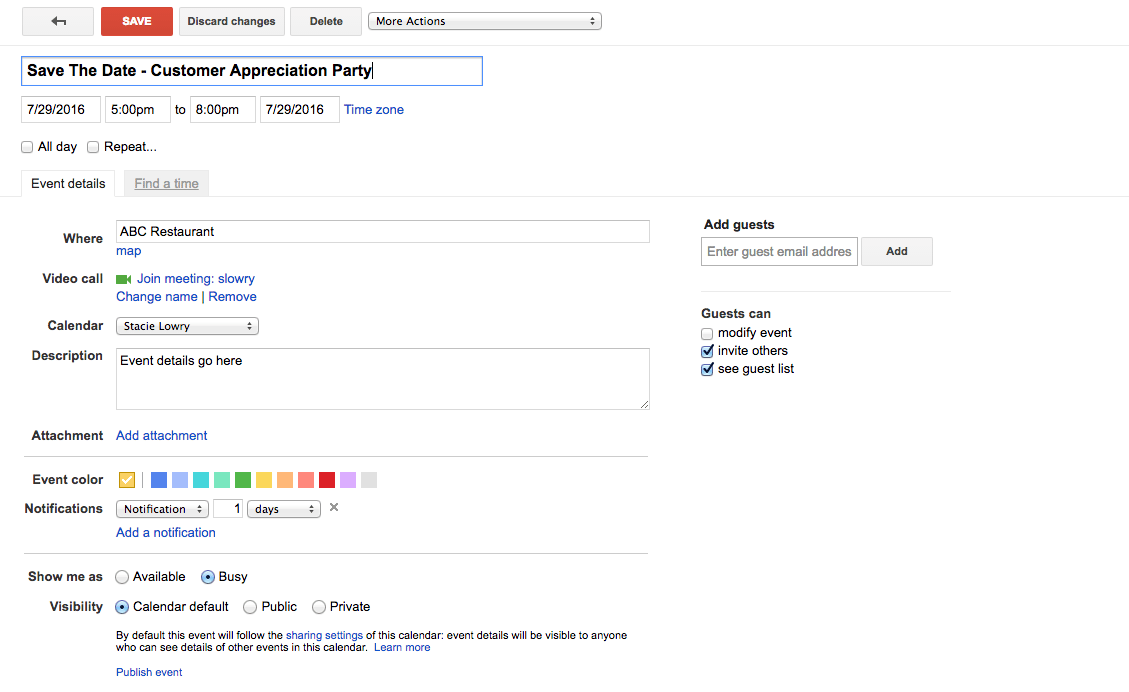
Go to your Google Calendar and follow similar steps as above by creating a new event. Fill in your event details and save the event. You won’t need to save a file to your computer for Google Calendar like you did for Outlook and iCalendar. Instead you’ll need to “Publish” it. Publishing it will generate a link to use in your email or webpage.
To “Publish” the calendar invite, go back and open the event on your calendar. At the bottom of the invite, you’ll see an option to “Publish event”. There you’ll get the link to use in your email. The trick for publishing the event, though, is that the calendar has to be “Public” for anyone other than you or your shared contacts to be able to see it. You can adjust that in the “Shared Settings” for Google Calendar.
How to insert the calendar links into your email
Now that you have all of your calendar invites created in the 3 major platforms, you’re ready to create your links within your email or webpage.
First, build your buttons or text links for each of the calendar options – Outlook, iCalendar, and Google Calendar. If you want to use buttons, we recommend creating bulletproof buttons. These will show in any email client even if images are turned off. Tips for creating bulletproof buttons can be found in another Tivoli blog post.
Anyway, back to adding the links to your email. Once you have your CTA buttons or text all set, here’s how you insert the add to calendar link to the different calendar invites you created earlier.
For Outlook and iCalendar, take the ics files you created and upload those to your ESP. We typically use Salesforce Marketing Cloud (ExactTarget) as our ESP. We load the ics files into our Portfolio to then grab the pathway for it. That pathway is what you will use for your href for both Outlook and iCalendar.
For Google Calendar, simply insert the link that was generated when you published the invite as your href.
Once you have your links in place, make sure you test them. Make sure a calendar invites pops up for each and adds to the calendar. Then you’ll be all set. You’re guests can now use the add to calendar link in your email.
That’s it.
Though somewhat tedious for you, this is a great way to make it super easy for your customers to save your upcoming event to their calendars. We hope you have a fabulous event! We also have additional tips to drive engagement to make your email campaign a success.


Leave A Comment